-
-

Plastic drainage pipes have become a cornerstone of modern plumbing and infrastructure design, appreciated for their lightweight, corrosion-resistant, and cost-efficient characteristics. However, like any infrastructure component, they can fail over time—developing leaks, cracks, or joint separations due to soil movement, freezing temperatures, or improper installation.
Understanding the right repair techniques ensures both homeowners and professionals can minimize damage, reduce costs, and extend the system's life. This comprehensive guide explores:
The most common problems affecting plastic drainage pipes
A detailed, step-by-step repair method
Recommended materials for temporary and permanent fixes
How to decide between repair vs. replacement
Preventive practices to improve long-term durability
Whether your system uses PVC, HDPE, or PPR pipes, these techniques align with best practices found in European (EN 752/EN 1401-1) and North American (ASTM D3034) drainage standards.
Even durable materials like PVC, HDPE, and ABS face stress over years of use. The most frequent failures include:
Freezing and Thawing: Water expansion during freezing cycles can produce hairline cracks, especially in shallow-buried pipes.
Soil Shift and Pressure: Improper compaction or heavy vehicle loads above buried lines can deform or fracture pipes.
Tree Root Intrusion: Roots infiltrate joints or micro-cracks in search of moisture.
Installation Errors: A poor slope, unsupported joints, or use of mismatched fittings often accelerates structural fatigue.
Chemical or UV Degradation: Prolonged exposure to sunlight or harsh effluents weakens pipe integrity.
Fact: A National Association of Home Builders study found that nearly 30% of drainage failures in residential projects stem from external soil pressure and root intrusion. Early inspection prevents costly excavation later.
A systematic approach ensures strong, long-lasting repairs.
Step 1: Identify the Problem
Locate the leak or crack precisely. Watch for wet soil, unusual pooling, or stains on adjacent surfaces.
Step 2: Expose and Clean the Area
Carefully excavate around the pipe if underground. Use a wire brush or sandpaper to clear debris, mud, or oxidation from the surface. Cleanliness is essential for adhesives to bond effectively.
Step 3: Choose the Repair Method
Hairline fractures: Epoxy putty or solvent-weld patch.
Larger openings: Flexible pipe wrap, rubber coupling, or mechanical sleeve.
Severe damage: Cut and replace the affected section using couplings.
Step 4: Apply the Repair Material
Follow manufacturer's instructions precisely. Ensure full coverage over the crack and maintain pressure or alignment during curing.
Step 5: Allow Curing Time
Epoxies typically cure in 2–6 hours, while solvent or fusion joints may require 12–24 hours before exposure to water flow.
Step 6: Test the System
Run clean water through the drain line to confirm the seal. A dry inspection after 30 minutes verifies a successful fix.
Material | Application | Advantages | Considerations |
Epoxy Putty | Small surface cracks | Quick-set, waterproof, easy to mold | Not suitable for pressurized systems |
Rubber or Fiberglass Patch Kit | Medium leaks | Flexible, strong adhesion | Requires complete drying before application |
Pipe Couplings / Slip Joints | Section replacement | Long life, durable seal | Need clean straight cuts |
Rescue Tape / Sealant Wrap | Temporary solutions | Fast, inexpensive fix | Short-term, monitor regularly |
Replacement Pipe (PVC or HDPE) | Major damage | Permanent structural fix | May require excavation equipment |
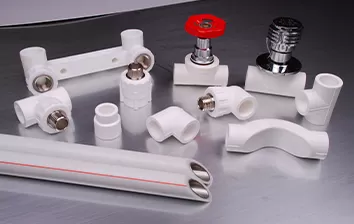
Professional Note: Products from Jiangte—including HDPE and PPR fittings—offer excellent chemical resistance, tensile strength, and ease of welding, ensuring durable, leak-free joints that outperform many low-grade alternatives.
Knowing when repairs stop making sense saves both money and time.
Repair:
Cracks < 10 cm or leaking joints that are accessible.
Materials are under 10 years old or structurally intact.
Replace:
Large fractures, deformation, or multiple leak points.
Recurrent leaks even after patching.
Old installations with embrittled plastic or outdated sizing.
As a rule of thumb: if total damaged length exceeds 20–25 % of the pipe section, replacement is more cost-effective and reliable than repetitive patching.
After the fix, take proactive steps to prevent recurrence:
Regular Inspections: Check drainage lines biannually, especially before rainy seasons or freezing weather.
Proper Backfill: Use gravel or sand for bedding to alleviate soil pressure.
Root Barriers: Install root guards near trees or shrubs.
Monitor Water Flow: Slow drainage indicates blockages or reemerging leaks.
Use Quality Materials: Upgrading to PE or PPR pipes from certified manufacturers like Jiangte improves flexibility and long-term performance, cutting repair frequency dramatically.
Sustainability Tip: Recycling removed plastic sections aligns with environmental programs like EU Directive 2008/98/EC aimed at reducing construction waste.
Always wear gloves and safety goggles when handling chemicals or adhesives.
Avoid open flames near solvent-based materials.
Dispose of old or contaminated pipe sections responsibly—many municipal recycling facilities accept cut HDPE/PVC waste.
Repairing plastic drainage pipes doesn't have to be complex when approached with proper knowledge and materials. By identifying the issue accurately, cleaning thoroughly, using the correct repair compound, and testing carefully, most small to medium damage can be restored to full integrity.
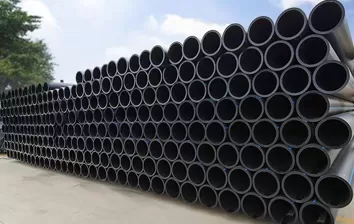
However, for aging or severely damaged systems, investing in a replacement using high-grade HDPE or PPR pipes ensures long-term system stability, energy efficiency, and safety.
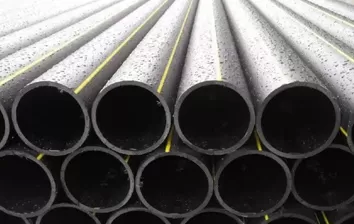
Jiangte, a global leader in polymer piping systems, delivers reliable PE and PPR solutions that withstand soil pressure, chemical exposure, and environmental stress—ideal for both residential and municipal drainage infrastructures.